Feeds:
Posts
Comments

Archive for the ‘YUPO paper’ Category

FLOWERS/FLOWERS/FLOWERS!

Wisconsin—February 2021. A scenic old-fashioned winter. Outside, white/white/white everywhere. Beautiful, but most of us in my circle of family and friends are saying “Enough!” Even my Louie (pussycat) is saying “Enough”. (I tend to be anthropomorphic about my cat; we talk to each other a lot.)

Both Louie and I spend a lot of time gazing out through the patio door to the garden and snowy landscape beyond. We watch the bird feeders, for different reasons. (Louie never gets out to fulfill his fantasies.) We wait eagerly for that first sign of life as March approaches, the moment when the returning morning sun blasts into my east-facing patio door, and our resident chipmunks emerge from their dens.

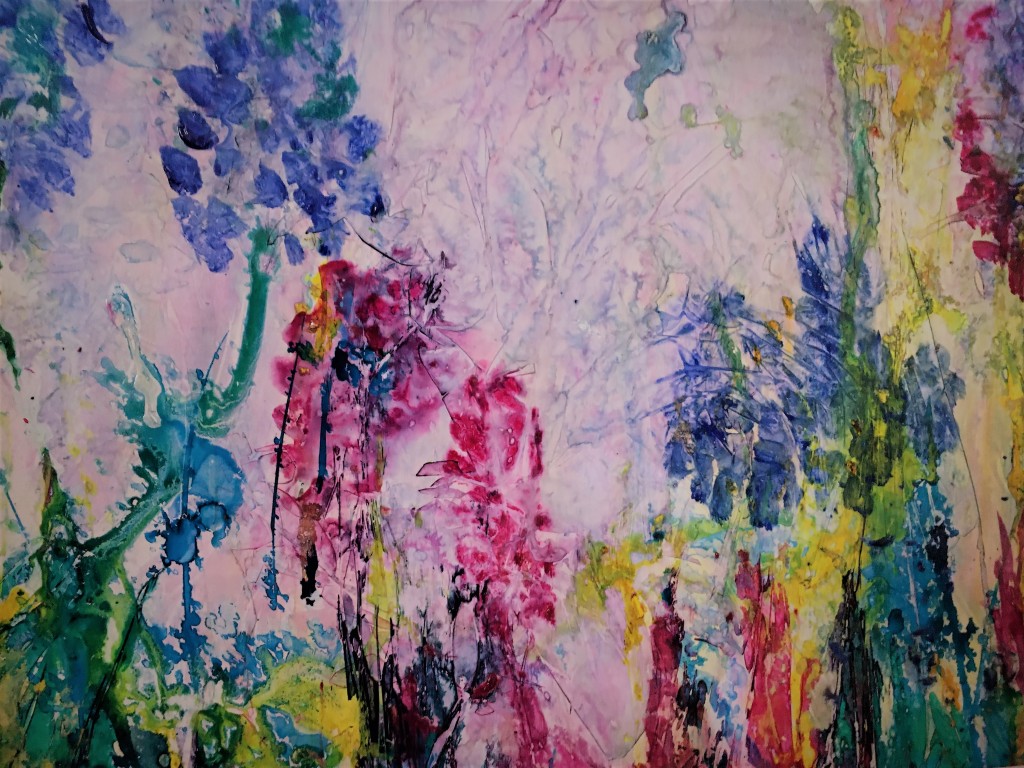
Meanwhile indoors, flowers! Green things, many colored things shooting up from the ground. Life is happening in my art corner. Lots of life emerging on Arches 140lb paper, and on YUPO paper as well.

The above flowers are blooming on a 20″ x 24″ sheet of YUPO—that mysterious poly-something, a kind of shiny non-porous plastic that artists either love or HATE! The “lovers” are those who enjoy throwing paint around (shades of Jackson Pollack) and then standing back to see what will happen.

The “haters” of YUPO are those artists who favor control over their paints, and strive for detailed and accurate representation—illusive and nearly impossible on YUPO.

The above rendering is a mutation. My mind was so entrenched in flowers that I just kept adding, layering, slathering, throwing paint like crazy on the poor sheet of YUPO. Suddenly I realized that I had a huge, gunked-up MESS! It was horrible, even disgusting!

Enter: one of the charms of YUPO. You can wash, even scour the paint off many times and get back to the original with just a twinge of tint. Had the above been painted on actual paper, it would probably have been destined for the bin—although I may have tried to redeem it with gesso.

Anyway, this mess got marched to the sink where it was washed and washed—drenched in running water. I did not scour—but rather just rinsed until the ugly stuff had disappeared down the drain, and what remained—my very first layer—was something I could live with. Then, realizing my tendency to overwork I quit without another stroke.

Flowers in February—blooming from a one-track mind.

Margaret L. Been — February 22nd, 2021

Read Full Post »

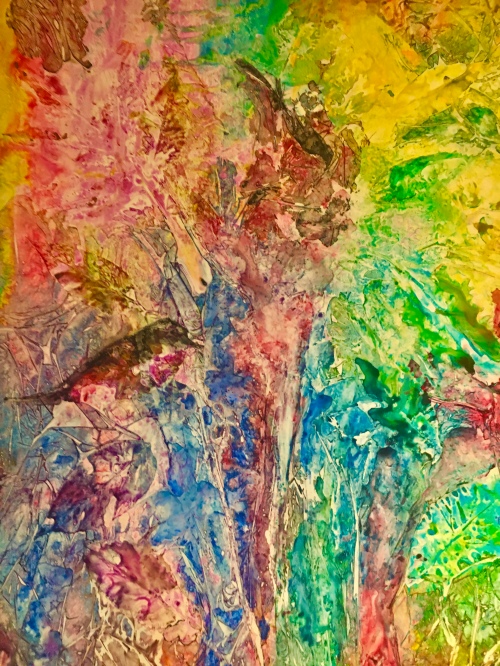
This is my favorite so far, of the FRACTURED LEAF PAINTINGS. The bird, left of center part way up, was a leaf when I removed the plastic film and leaves. (Scroll down to the entry before last, for an explanation of the process).

So I tweaked a beak and tail feathers. Pardon me: not tweaked, TWEETED. (I can hear your groans.)

A smaller bird is perched farther up. The leaf/bird painting is 24″ x 20″, framed, and hanging in my living room.

Margaret L. Been — January 17th, 2021

Read Full Post »

Almost a year — and what a year! I had decided never to blog again, as I so love NOT having to sit at my computer, when I have so many fun hands-on things to do. But in recent days, a current issue surfaced that I simply had to address or I would not have been able to live with myself. Yesterday, I posted that issue on my NORTHERN REFLECTIONS blog. Today, because an art blog is the most fun of all, I am hereback again.

Ever since I can recall, I have been besotted with leaves–especially those that drift from the trees in autumn. As a child, I colored fresh-fallen moist leaves with my crayons, and then pressed the colored leaves onto white cloth with a hot iron. For decades I have been gathering the perfect specimens of autumn bounty, and drying them beneath pages of heavy books. In recent years, I have made collages with these dried leaves on gallery wrap canvas panels, adding acrylic paints and a final fixative before hanging on the wall..

So for me, leaf art is nothing new. But this last fall, I was tardy in my gathering. By the time I was rustling and crunching around in the fallen leaves they were mainly dried, curled, and FRACTURED. Thus the idea of “Fractured Leaf Art” was hatched. The results were so intriguing, so nurturing to my voracious appetite for the abstract that I may never look back!

There are no two Fractured Leaf Paintings alike. And the process is so basic that any six-year-old, given the need for patience between stages, can produce a painting to be proud of. Since I have many young people in my family, I am eager and excited to share THE PROCESS!

I quickly discovered that the best Fractured Leaf Paintings (in my opinion) are achieved on Yupo Paper–that odd, shiny surface that is not paper but rather a “poly . . . . something”, in other words a kind of plastic. I spray the Yupo with clear water, and then spread 2 or 3 watercolors of my choice randomly around the surface, tilting the piece and causing the colors to merge. Then I press the fractured leaves or pieces of leaves onto the wet paint–again randomly. To this beginning I sporadically add more paint colors and salt, and press plastic food wrap (like Saran) over the entire surface. With my fingers, I crinkle and bunch up the food wrap, creating bubbles, creases, and a myriad of lines. This whole bit gets weighted down with heavy books, jars of brushes, or anything else with heft.

After a couple of days, I tentatively remove the food wrap to see if the surface is dry. Obviously Yupo takes longer to dry than normal watercolor paper, because the Yupo is not absorbent. When everything is really dry, I remove the leaves and scrape off the salt with an old credit card. Voila! Fractured Leaf Art.

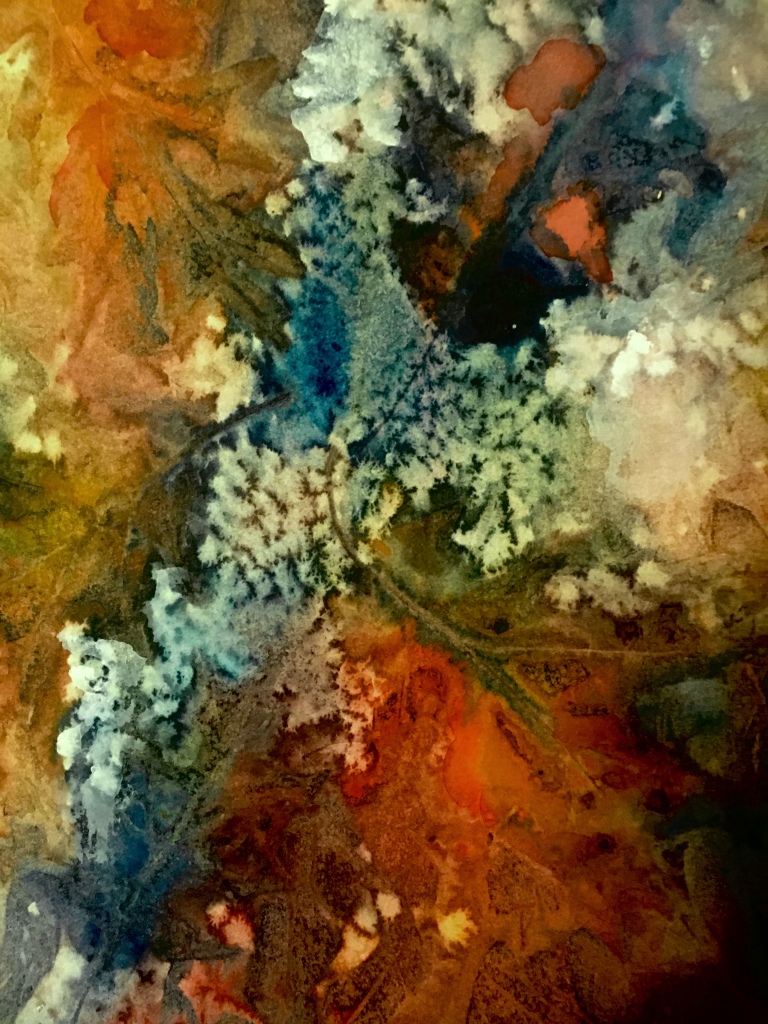
At this point the painting may need a little tweaking, perhaps some more paint or the emphasis of a few lines or branches along the creases made by the food wrap.* Or the piece may be gorgeous as is. In the above pictured painting, I did not tweak. To me the painting was just right in its natural state, and realizing my tendency to overwork my art I decided to add no more.

Always, when using Yupo I spray the work with an acrylic fixative. While not striving for museums, I do want my art to last for at least a couple of lifetimes.

So you might have a go at Fractured Leaf Art. I definitely live in a four season zone. (Wisconsin: Spring, Summer, Autumn, and Winter/Winter/Winter.) Different locales have different trees, and it would be fun to expand my leaf knowledge. Perhaps my Florida family members will bring me some palm leaves.

Margaret L. Been — January 14, 2021

*When adding branches or lines, I have discovered a trick of using a DERWENT INKTENSE PENCIL which has been dampened, rather than a paint brush. The damp ink pencil adds a soft, blurry line rather than a harsh one. I favor organic as opposed to the popular geometric style of abstract art.

**An excellent Austrian fine artist does amazing paintings using all kinds of wild materials gleaned from her nature hikes. You can check out this mixed media artist and her books by GOOGLING her name, Waltraud Nawratil. You will not be disappointed.

Read Full Post »

An inventory of what I have done in my studio over the last year has proved a bit surprising—or maybe not!  For 8 months out of the 12, I have been gimped with ortho issues. A shoulder replacement in late 2017 had only just begun to heal when a hip kicked in saying, “Hey, it’s not fair. I want some of this attention.”

Two major hip surgeries later (the 1st, a total hip replacement and the 2nd, to repair a severely fractured femur with screws, metal hooks, and wires that make me think of civil engineered bridge construction) I am still hobbling and spending much of the time off my feet.

For several weeks it was 1 leg only, to navigate this “kid in an old body” to and from a cozy living room couch (my 24/7 hangout) to a bathroom (about 5 yards away), my piano right behind my couch, and an extra art studio which my wonderful husband set up for me at the nearby end of our dining room table.

Books, limited piano practice which—although done sitting down—wore me out, my French tutorial apps and a Public Television app on my I-pad (I re-watched the entire DOWNTON ABBEY), serial-shopping on Amazon (FUN/FUN/FUN!), Van Cliburn and other geniuses streaming through my devices into our fine speakers day and night (1 of which speakers was conveniently located beside my ear on my 24/7 couch), my knitting (how many cowls does anyone need?), and ART made up my life for much of 2018.

Who needs to cook, scrub floors, vacuum, and dust anyway?

I normally avoid medical discussions except with those professionals to whom Medicare is paying me to complain, but the above diatribe is to demonstrate how life can be a lot of fun under rather strange circumstances! And how art can thrive, when pain and disability prevail. One’s pain can literally be “drowned” in paint, especially the wet into wet method of working which I prefer.

Anyway, my inventory yielded a surprising 35 paintings that I actually like. (There are always the “duds” which get stashed on a shelf for possible reworking or salvaging parts; or sometimes they are so outrageous that I trash them.)

The keepers range from (3) 20″ x 24″ biggies, a 16″ x 20″, a handful of 11″ x 14″ renderings, and a preponderance of 12″ x 16″ paintings—obviously my favorite size. The paintings are predominately woodland scenes and funky individual trees—with a smattering of flowers, a sailboat in trouble, some landscapes with distant castles, a still life (my least favorite), and a huge, totally abstract on Yupo Paper which I LOVE most of all.

Although my inventory preferences are not exactly written in the proverbial stone, they are indicative—and it was fun reviewing a year of art making, body disability notwithstanding.

The year’s earnings amounted to $700.00 which constituted a donation to, and sale at, our local art group’s annual fundraiser. My dislike of office type stuff is such that I can find no record of which paintings I donated. I believe they were “masterpieces” from former years.

Also, I give paintings to interested friends and family members. As with club donations, my right hand (very happily) does not know what my left hand is doing.

I share many of my favorites via prints glued to notecards, thus bragging about my art while facilitating my passion for writing actual letters as opposed to emails.

Above are the end of 2018 renderings, hardly even dry when I photographed them with my I-phone camera. They tend to make me think of Spring, and they are my HAPPY NEW YEAR to you!

Margaret L. Been, December 31st, 2018

Read Full Post »

winter-sunrise-4-1

I often giggle when I think of what comes out of my studio in contrast to the work of gifted, well-schooled artists!  Highly skilled artists may be among the most generously-encouraging-to-beginners group of professionals on earth.  We all are included in a vastly diverse culture where there is a place for most anyone at any level and inclination.

But I have a library of art books—both “how to” tutorials by well-known artists, and tomes of art history and criticism.  I love to study these books, and I do know the difference between classic art and smoke and mirrors—my off-the-cuff “hashtag” for a bag of tricks which I am delighted to share with any beginner who is eager to paint and willing to spend hours each week, building an inventory of paintings in his or her studio.

My 12″ x 16″ rendering below is titled “Between a Rock and a Hard Place”, and it is composed of tricks that my seven-year-old great-grandsons could perform if they decided to sit or stand still long enough,  I began by slathering gesso on the 140# cold press paper to create rocky slopes.  After the gesso dried, I sprayed the surface with water and applied different watercolors—jiggling the paper so the paints could blend and do their own thing,  When those paints dried, I streaked a thinned application of white gouache here and there to add mystery and a sense of age to the rocks.  VoilĂ .  Smoke and mirrors.

A Rock and a Hard Place

The next example displays a couple of favorite tricks:  plastic wrap and salt.  (I use Kosher salt, but any will do—creating slightly varying effects).  The paper used here is Yupo, that glass-like surface which is not really paper, but rather an amalgamation of chemicals.  (There is no middle ground with Yupo.  Artists either love it or hate it.  The lovers are the “let it all hang out” group of which I am one, and the haters are the perfectionists who do well with lots of control.)

Where you see crinkles and wrinkles, that is where the plastic wrap was applied.  It takes a long time for the paint to dry under plastic wrap on Yupo, and less time on a rag surface which is absorbent.  The spots and phased-out parts were done with salt.  The salt technique is far more spectacular on rag paper than on Yupo.  The painting at the top of this page shows the result of salting the wet paint on rag paper.  Salt can make snowflakes, clouds, stars, dandelion fluff, and many additional effects,

Thus you can see that whenever art making is a person’s dream, it can be done.  And every dream will materialize differently—as each of us is unique.  What fun we can have, sharing our ways to implement the smoke and mirrors!  🙂

Smoke and Mirrors.JPG

Read Full Post »

ink 1

Recently I attended a workshop on the use of alcohol inks.  The class was held in a studio a few lovely country miles from our home, in a neighboring community.  There were 15 of us in the workshop.

Alcohol ink only works its great magic on a non-absorbent surface, so we used my beloved Yupo paper for our introduction to the medium.  For our first of 3 renderings, the instructor talked us through a basic technique which we all followed; we made rings of dots from drops of the ink, in colors of our choice, then blew through a straw to move the ink around.  We added more blobs, blew some more, etc.

The beautiful freckles on the above sample, my 1st, were created by holding the surface of the work up horizontally and spraying horizontally from a bottle filled with Isopropyl Alcohol.  The bottle needs to be significantly up and away from the painting so that the drops will fall gently on the paint, rather than in torrents—which would send the colors flying in additional directions.

From these humble beginnings, each of us created our first alcohol ink art, and every painting was totally unique.  Clone-type workshops are currently in vogue, where a group of people follow a formula and all come up with nearly identical paintings—wine consumption notwithstanding.  I have heard raves about these gatherings, as if they were some kind of a Renaissance Revolution.  But conformity and uniformity in art are unspeakably dull, I think:  as lackluster as painting by number.  An art class such as the one I’m describing, where each participant makes something different and one of a kind, is a GOOD CLASS!

For our second rendering we were encouraged to make a close-up of flowers popping up out of grass.  The instructor had one of her paintings as a sample.  A few in the class mimicked the leader’s choice of colors and format, but most of us simply did our own thing.  Here is my #2:

ink 2

We concluded with one more piece.  My #3 was my very favorite, but alas; the next day, I sprayed all 3 paintings with a fixative, got the spray too close to the surface of #3, and caused the ink to revitalize and run.  So #3 got altered, not to my liking.  Nonetheless, it is pictured below:

(Try to imagine that the magenta blur on the top half of the painting is not really a blur, but rather a hint of foxgloves hanging like bells—as in the lair of the Foxy Gentleman in Beatrix Potter’s TALE OF JEMINA PUDDLEDUCK.)

ink 3

Blurred foxgloves nonetheless, the alcohol ink workshop inspired me.  In July, the same instructor will show us how to apply the medium to glass, metal, and ceramic tiles.  Meanwhile, I’m eager to share this newly-discovered art with my great-grandchildren* who live nearby.  Too much fun!

Margaret L. Been  —  May 29th, 2017

*Divided between Wisconsin, Florida, Minnesota, and California, Joe and I have 18 great-grandchildren.  And #19 is scheduled to appear in South Carolina on Christmas Day, 2017. 

Now wasn’t that a sneaky way to get in a big brag?!!!  🙂

Read Full Post »

Heading Home for Good.jpg

I doubt there is any middle ground with Yupo paper.  One either loves it or hates it.  The “haters” are those artists who demand control of their paints, and always work with an unflappable agenda in mind.  These folks create beautiful works of abject realism, and often artists of palpable realism are highly trained and amazingly gifted—especially if they achieve high end realism in watercolors.  Everyone knows that chasing watercolors is a bit like herding cats.

I am neither highly trained nor amazingly gifted, and fortunately the art I love the most does not fall in the category of abject realism.  My favorite artists, the French Impressionists, Post Impressionists, Les Fauves, etc. who worked largely in oils were realistic to a degree, but always with an intensely personal voice.  For anything other than “personal voice” I would use a camera—and for me, that wouldn’t be half as much fun as getting out the Yupo and letting the paints fly hither and thither.

Last week my good friend and fellow artist, Vikki, and I shared an art day at our dining room table.  We began on Yupo.  My rendering was, for starters, terribly generic and dreadfully similar to stacks of other paintings I’ve done:  tree – space – tree – space;  leaves and blossoms on tree – space – etc; and plomp – plomp – plomp – ad nauseum.

Now I detest—and desire to always eschew—the plagiarizing of any thing or any person, including myself.  So that night I looked over this Yupo thingy, almost upchucked, sprayed it with my trusty water bottle, pressed plastic clingy food wrap onto the entire surface, and went to bed.

The next day I removed the cling film and VOILĂ€!  Something I could further develop and live with:  the suggestion of a Viking ship* with sails, and lots of turbulence all over the place.  So much better than plomp – plomp – plomp!

I added delineation and definition via gouache to the vessel and its surrounding sky and water—leaving a plethora of confusion, color, and turbulence in the sails as if the depicted journey was, like many of life’s journeys, fraught with distractions, dead-ends, and disasters.

However I am always a positive-note person, so then I named the piece:  “Heading for Home the Last Time”—reflecting my blessed assurance in a glorious destination through it all, and eternal joy in the presence of my Lord Jesus.

Margaret L. Been, May 2017

*Because this painting is matted and framed to 12″ x 16″, it was too large to entirely fit in my scanner.  Thus the ends of the ship do not completely show on the print.  The original in its full size is more representative of an actual Viking ship.  Since my husband is descended from Vikings, and loves ships, I wanted to be somewhat realistic.  🙂

Read Full Post »

Here is a bold venture:  a painting which turned out to be too large for the ready-made frames at our local craft stores.  I had grabbed an entire sheet of Yupo® and had a blast, painting and thinking I would crop the finished work to fit a 24″ x 20″ frame which I had on hand.  But I was pleased with the entire piece, and couldn’t figure out where, if any, I wanted to sacrifice part of it.

A brainy idea:  custom framing.  This is pricey indeed, and I will not do it very often.  But the result is satisfying.  Below you can see The Big One on a living room wall:

Wall 2

AW.JPG

Many layers of gouache were piled onto this painting, over washes of watercolor.  Actually called “Waterfall”, this rendering evokes memories of a real waterfall we had on our 14 plus acres up north, where we lived full time for eight years.

Our land bordered on two roads, one up and one down a hill.  Our home was on the downhill road, next to a lake.  In the spring, snow and ice melted from the above road and roared downhill to our back yard, over boulders and brush.  The sound was stirring, and so loud that it resonated through closed windows.  In the summer, the waterfall morphed into a trickling downhill creek—always refreshing to sit beside on one of the big boulders.

How beautiful to have mellow memories, and then to paint them (and have them framed)!

Margaret L. Been — April, 2017

NOTE:  Obviously I couldn’t scan this painting on my home scanner, so I photographed it with my cell phone.  Because the piece was framed with non-glare glass I could do that.  But I failed to get the entire bit into the top photo.  In the shot of the painting on the wall with its surrounding environment, you get a better idea of how the waterfall fans out at its base.

Read Full Post »

Ex 4

Ex 2

Ex 3

EX 1.jpg

Years ago I giggled when I heard of art instructors telling workshop participants:  “The paper is talking.  Listen to the paper!”  But now, in my eleventh year of art-making and experimenting with different watercolor grounds, I no longer giggle.  Paper talks!  Paper says different things about the paints and techniques applied.  For a fun demonstration of this fact, I did an almost identical landscape on the above four papers using identical techniques, with a slight variation in my DaVinci artist grade* colors.

First, I applied clear water to a wide horizontal strip at the top, and a smaller swath on the bottom—leaving a dry streak between the wetted areas.  Then the top wetted strips were washed with blends of phalo and French ultramarine blues—and the sky areas were sprinkled with Kosher salt.  Avoiding the dry parts, I added color to the dampened below sections:  red, green, gold, and a bit of blue—while, as always, letting the paints mingle on the papers rather than on my palette.  On each piece, I pressed plastic food wrap onto the bottom area while the paint was still wet.

The papers represented are, from top to bottom:  1) Yupo paper with its especially unique voice, particularly in the way it talks back to applications of plastic wrap; Numbers 2) and 3) 140lb sketching pad paper—American Journey available online at CHEAP JOE’S, and Canson available at many chain craft stores; and 4) Arches 140lb cold press paper by the sheet, available at online art stores (and neighborhood fine art stores, if you have one.)  (Arches is pronounced “Arshe”.  Remember it’s French, and I may scream if you pronounce it like those golden thing-a-ma-jiggies on the MacDonald’s fast food signs!)

Yupo has no tooth whatsoever; rather it has a shiny, slippery surface so it will always make it’s own statement, without even trying to imitate.  You may notice a smoothness because of a lack of tooth on the 2 middle papers as well:  the sketch pad papers.  Also, note that on the 2nd of the smooth-surfaced sketch pad papers the food wrap film caused the paint to slide up and nearly obscure the strip which I had left white and dry.

The Arches 140lb cold press displays more texture around the salt, and somewhat more under the plastic film, due to the presence of tooth.  And on the Arches sample there is a charming bit of “cauliflowering” where wet paint has oozed into the dry area, also caused by tooth.

(Cauliflowers will normally be very prominent on paintings where wet colors collide on Arches 140lb cold press and comparable fine papers—especially when freshly painted strokes touch not-yet-dry parts.  Traditional watercolorists will practically do headstands to avoid cauliflowers, while I perform similar gymnastics just to make sure that I create and preserve them!  “Different strokes for different folks!”)

Different papers have different stories to tell.  By listening (LOOKING!) you can begin to ascertain what more you might want to add or change to complete the work, or do alternatively on another kind of paper.  In the above cases, done mainly for the purpose of illustrating variations in papers, I have done nothing more to any of the samples.

Margaret L. Been —  April, 2017

*My husband and I are blessed with many great-grandchildren.  (Dare I brag?  Well, I’m going to:  we are blessed with 18 of them—so far!)  Frequently, we have art days at our dining room table; what a delight!  Although I sometimes let the very young children slosh around on the economical sketch pad 140lb papers before launching into the high quality “Arshe” sheets which I nearly always use for my own finished work, I am terribly fussy about 2 aspects of art for all ages:  good brushes and artist grade paints.  No matter how young the beginner, good quality brushes and paints are essential.  Poor quality yields disappointing results, and the potential future joy in a pastime of art-making is not to jeopardized:  not at my table!!!

And that’s no April Fool!

Read Full Post »

Another DVD I watch and absorb again and again is Taylor Ikin’s DANCING WITH YUPO.  This Florida-based fine artist’s (1 hour, 58 minute) tutorial has probably done as much, if not more, to free me up and send me painting on my way—as any other resource in my sizeable home library of books and DVDs.

The huge secret (but not REALLY a secret!) is Taylor Ikin’s use of YUPO® paper, which is actually not paper but rather a shiny washable plastic–coupled with her method of always standing and moving around* while working, and using totally-generous, extra-humungous amounts of paint mainly applied with a 2″ or larger square brush.

In her DVD Taylor Ikin depicts a downhill stream tumbling over rocks, with a forest in the background and lots of wild growth along the banks.  Taylor begins by spritzing the sheet of YUPO with her spray bottle of water, and applying thick brush loads of rich undiluted colors for woods, water, foliage, rocks, and botanical stuff along the forest floor and riverbanks.

Taylor slosh/slosh/sloshes with brilliant, juicy straight-from-the-tube watercolors abundantly slathered on her brush which has been dipped in a commodious bucket of water.  (I normally use marinara sauce jars large enough to accommodate my 4″ wash brush, and a gallon ice cream pail for my water supply—the pail for rinsing and letting the pigments settle on the bottom, and one or two of the glass jars for fresh clean water.)

Then with her clean wet brush, Taylor begins to delineate water from land, while creating chunky textural tree shapes in the background.  Next, the forest foliage and groundcover evolve.  With YUPO, this is super easy, as any swipe of a brush or paper towel brings the wet painting surface back to its original white and ready for more action.  (When the paint is dry, a wet brush or wet paper towel will restore the white.  And if unhappy with any stage of the process on YUPO, one may hold the piece under a gushing faucet or float it in a bathtub of water.)

When Taylor feels her initial rendering is satisfactory, she recommends letting the painting dry**, perhaps even overnight.  When dry, the work is ready for tweaking and fine-tuning:  as Taylor puts it, deciding “What will make this a better painting.”  Now is the time-consuming stage of lifting, re-applying the shapes in a different way, making new shapes, removing colors, adding new colors, standing and looking at the work from a distance, holding the painting sideways/upside down/and in a large mirror, etc.  (I sometimes tweak and fine-tune for hours over a period of days, or even a couple of weeks.  My YUPO paintings usually consume more time than those on Arches 140# rag paper, because the YUPOs provide flexibility and so many more options.)

I have read books and watched tutorials by other YUPO artists, and quite frankly I have not warmed up to their work.  Excellently crafted, but simply not what I would want to hang on my walls.  But Taylor Ikin’s work has that magical quality to which I am inexorably drawn. Try GOOGLING her, and maybe you will be drawn as well.

YUPO is the perfect ground for the abstract realism style that I love.  It is perhaps the easiest surface for beginning painters to use because (unless you desire to create detailed, representational art that resembles a photograph) YUPO is encouragingly NO-FAIL  Every blob and drip of paint that blends with other drips and blobs will be beautiful.  A few quick blasts of diverse colors on wet YUPO are often “suitable for framing”.  But when more painstaking hours are invested, the rewards are even more incredibly satisfying.

One can play forever, with just one sheet of YUPO, painting and rinsing off the paint, experimenting with colors and brushstrokes.  Or finger strokes.  I have rediscovered the joy of finger painting, due to the fact that I have long hair and lots of it.  Frequently I spy a wisp of my hair in a work in progress. I dislike hair in a painting almost as much as I hate to find it in my food!  In the process of removing a hair with my pinky, gorgeous swirls will surface on YUPO.

Texture is easily achieved on YUPO—either by the application of modeling paste to make mountains, rocks, and tree trunks, or by dribbling texture medium onto the painted surface.  Salt and cling film (plastic food wrap) build texture as well.

The acrylic inks are vibrant on YUPO paper.  Another favorite technique is the slathering of gouache over water-colored areas.  The gouache may be built up impasto, to fashion floral still lifes or wild landscapes, while looking amazingly like oil paint.  I always spray my finished YUPO paintings with an acrylic fixative; this not only prevents smudging and smearing paint forever, but the fixative makes a lovely shine (although matt fixatives may be used if so desired).  Also, the acrylic spray will prevent the impasto gouache areas from flaking.

Thank you, Taylor Ikin, for your continual inspiration from DANCING WITH YUPO!  I have always loved to dance!  🙂  Here is a fresh off-the-messy-palette YUPO piece by moi.  It is titled “Irides”.  I can’t stop painting irides.  Although I’m certainly not to be compared with Monet (YIKES!) that master and I do have something in common:  repetition of a beloved subject.  Monet did haystacks and water lilies among other topics.  I do irides, along with woods, mountains, etc.  What a good life!

more-irides

Margaret L Been — February 25th, 2017

*Standing and moving around are the way to go, for me, as I have chronic orthopedic pain for which constant movement is the best medicine.  The pain ramps up greatly at night when I am lying in bed.  Rather than lie there and hurt (that would be STUPID!) I get up and move around our home—yes and sometimes dance, to the waltzes of Erik Satie as well as WITH YUPO.  🙂

**I am not a fan of drying paintings with a hair dryer, and rarely do this.  But once I tried it on a YUPO piece.  Not good!  Too much heat, too close to the painting ground and voilĂ —shriveled-up art.

Read Full Post »

Older Posts »